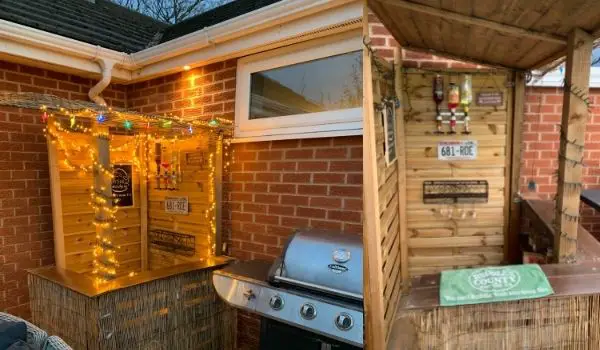
How to make a DIY pallet bar (Mine Cost Under £100!)

I’m so proud of my DIY pallet bar! It cost me very little to make, largely because we had a lot of the materials to begin with, but even if you don’t, you can get them relatively cheaply. When compared to the cost of buying a garden pallet bar which can range from anywhere between £400-£1000, this works out a bargain!
One of the great things about using pallets for a bar is most pallets have built in recesses on one side, making them perfect for built in shelving for bottles, glasses and other bar accessories.
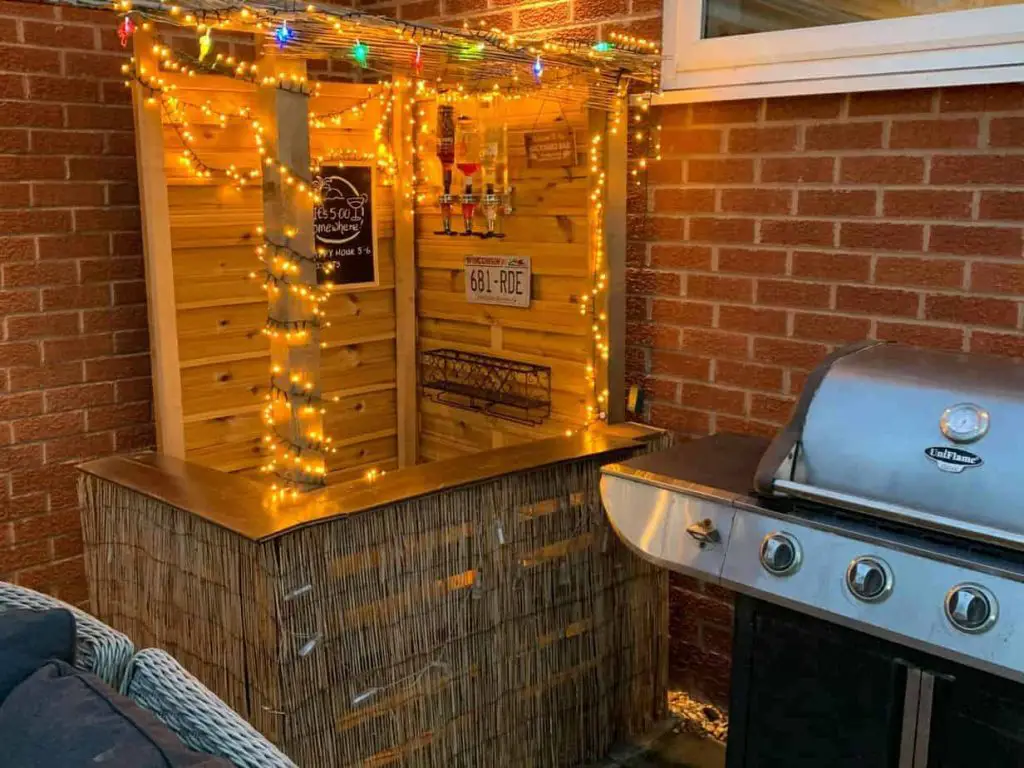
How did I make a DIY pallet bar so cheaply?
I was able to utilise a lot of materials we already had in the following ways:
Pallets – We already had several from garden deliveries, which is what made me start thinking about how I could make a garden pallet bar!
Counter top – this was spare wooden flooring boards from our dining room that I found in the shed. The wood is bamboo and seems to have lasted fine as the bar has been assembled for a year now. I don’t think this would work with laminate flooring boards though!
Leftover kitchen worktop offcuts would also be ideal for this project. You may be able to get some offcuts from a DIY chain for free or very cheaply.
Fence posts – Having just replaced our garden fencing, we luckily had a few spare posts left over.
Roof – I used a leftover fence panel from our garden fencing for this, but I have suggested using a sheet of MDF in the equipment below.
What did I need to buy?
Two good quality fence panels for the walls – £50. This was my biggest outlay.
Bamboo screening – £8
Various bar decorations – optics, signs etc. £30
So as you can see, for me this project was super cheap, coming in at under £100! If you had to buy all the materials I would say this would cost around £200, not including the tools, which luckily I already had.
A quick caveat
I know how easy it is to see an idea on Pinterest that is professed to being “super simple”, but actually requires a degree in engineering and your own welding tools to make. Thankfully, aside from a couple of tools this DIY pallet bar requires none of that. However…
I must confess that although the construction was pretty simple, my woodworking skills are not up to scratch. Had I done this project without my husband’s help then I would have struggled to screw it together securely (as I tried and failed a few times!)
If you’re a dab hand with power tools, or have a friend or relative who is then this shouldn’t be too much trouble, but if you’re a complete novice like me, it may be a little difficult.
How many pallets do I need for a Tiki Bar?
My design uses 2 pallets, but I have also included an option for a simpler, no roof 3 pallet tiki bar below.
Equipment You Will Need:
Another person (some of the steps require 2 people)
A heavy duty staple gun – I am actually so pleased I bought this Toolzilla model as it has come in super useful for other craft and DIY projects.
For The Bar:
2 Pallets – these can often be picked up cheaply or even for free on sites such as Preloved
4 Fence posts – at least 6ft (1.8m) tall
Bamboo screening – the cheapest one is fine as it will be easier to cut.
2 Fence Panels for the walls – These should be the same height as the fence posts, I used these (0.9m x 1.8m) and was my biggest expense.
A board or fence panel for the roof – I used a leftover fence panel from our garden fence. Again, sites such as Preloved could be a good place to pick up these materials for little cost or even free.
Countertop material (I used leftover wooden flooring pieces)
How do you make a bar out of pallets?
Begin by fastening together the 2 pallets with the L shaped brackets. You need to ensure that your side pallet is shorter than the front bar so that when the walls are fixed, you have a gap at the side in which to enter the bar.
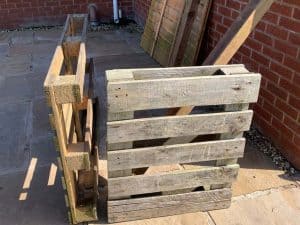
Assemble the pallets in an L shape so that the overlap creates a shorter side. Then attach the pallets together with 3 brackets on the inside at the top, middle and bottom. This is best done with a power screwdriver to ensure it is secured.
Set out your countertop to ensure it fits but don’t screw it in place yet.
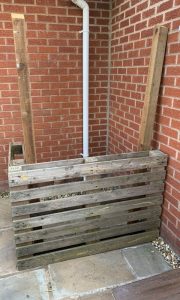
Attach 2 of the fence posts to the inside of your front bar, one at each end. Again this should be done with L shaped brackets. Ensure your counter top is not obstructed by the posts.
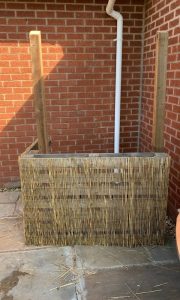
Use the bamboo screening to cover the front of your pallets. Secure it in place with the curved fencing nails or staple gun.
You can see my pallet bar goes for a Tiki look, but if you want something different you could use a different material. The bamboo screening I used for my DIY pallet bar was very cheap and flimsy. This actually made it perfect to work with as it was light and easy to cut, but if I was using it for its intended purpose as garden screening I wouldn’t be impressed with it!
While you’re doing this, you might want to cover your roof panel in the bamboo screening in the same way too, then set aside for later.
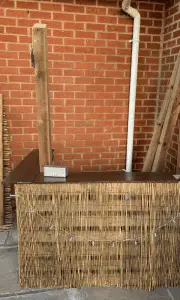
You can now go ahead and screw down the countertop.
Assemble the 2 fence panels in position for your walls with the remaining fence posts in between- this is definitely a 2 person job!
Secure the walls to the fence posts in the same way as before using the L shaped brackets.
Finally, position the roof on top and nail into position. Again, this is definitely a two person job and a stepladder is probably a good idea for this step!
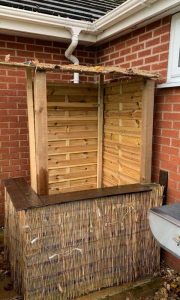
Now for the fun part!
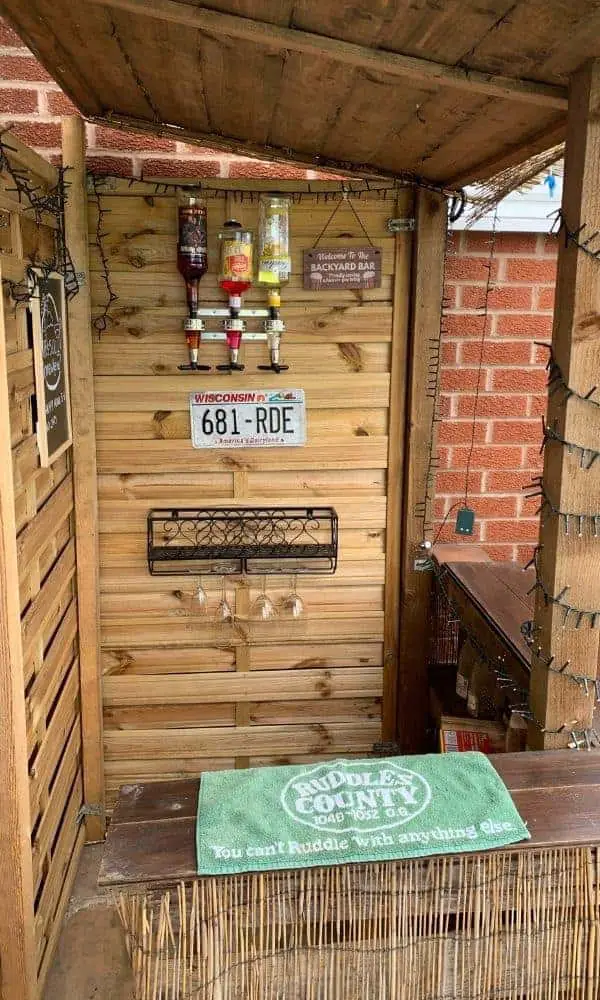
Once assembled and secure, you can get on with the fun part, which is decorating your bar! As I was going for the Tiki bar look, garden lights were the way to go. I used mains operated ones as we have an outdoor electricity socket, but battery or solar powered is another option.
DIY Pallet Bar Accessories
Garden bars are extremely popular at the moment, meaning that luckily it is easy to find bar accessories and decorations online. I used Amazon and eBay for most of my decorations as follows:
Optics: I found that adding optics was the thing that really transformed it into looking like a bar.
Shelf:I also bought a wall mounted glass holder and shelf for storing bar bits and pieces.
Bar Art: There are a multitude of eBay and Amazon shops selling metal bar / man cave signs. I got my genuine American number plate from Platemine.
Simple 3 pallet tiki bar variation
If this DIY pallet bar is a bit too complicated for you, a simpler version without walls and a roof would be to use 3 pallets to create a simple bar. You would only need a counter top, the pallets and the bamboo screening. Drinks can be stored in the recesses of the pallets on the inside.
Could you make your own pallet bar?
Are you going to have a go at making your own pallet bar? I would love to see your creations if you do!

About the Author
Melissa is a working parent who left behind a senior management salary for a better work/life balance. Following her own money saving and money making strategies she was able to clear debt and live a life she loves.
Blogging, selling digital products on Etsy and selling preloved items on eBay and Vinted are her favourite side hustles. Read her story here.
Other posts you might like:
How to Save Money on Lay Z Spa Running Costs
How I Pay for Christmas out of spare change
How I made over £1000 on eBay in 90 Days

